DTF transfers have reshaped fabric decoration with vibrant color, a soft hand, and broad substrate compatibility. To get consistent results, embrace DTF tips and a reliable direct-to-film transfers workflow that saves time on setup and production. This guide covers DTF printing essentials, from film and ink selection to optimizing a heat press for DTF. A focus on DTF troubleshooting helps you spot issues early, reducing waste and rework. Whether you’re new to direct-to-film transfers or upgrading an existing setup, these strategies aim to deliver shop-quality results.
Beyond the label, this approach is often described as film-to-fabric transfers or a print-on-film workflow that primes textiles for durable adhesion. From an LSI standpoint, related concepts include color management in DTF printing, selecting the right transfer film, and the role of heat pressing in the final result. Recognizing these terms helps designers and shops navigate the broader family of direct-to-film transfer technologies and apply best practices across fabrics. As you explore these variations, you’ll see how workflow—from artwork to post-press care—impacts print quality and garment feel.
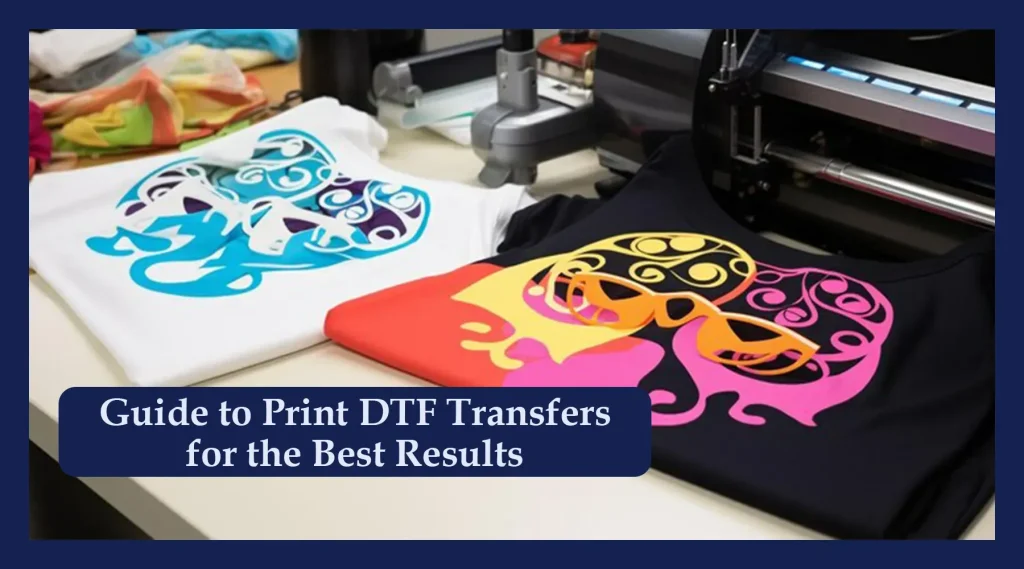
DTF transfers: Essential Setup for Consistent Results
Setting up for DTF transfers begins with the design file and color workflow. Start by selecting high-resolution artwork, preferably vector for sharp edges, and export raster images at 300 dpi or higher. Use device-independent color spaces such as sRGB and calibrate your monitor so what you see on screen aligns with what prints. This foundational step reduces color shifts and edge artifacts when you translate your design to fabric via direct-to-film transfers.
Create a prepress routine that includes test prints and proofing across multiple garments. Document settings that work well on cotton, polyester, and blends, then reuse them as a baseline. By treating this as a reproducible DTF tips process, you lock in predictable results and minimize trial-and-error during your DTF printing workflow.
Mastering DTF Printing: Color Management, Film, and Ink Choices
Choosing the right DTF film and inks is critical to color brightness and durability. Look for a PET film with consistent adhesive properties and a reliable white ink layer to ensure opacity on dark fabrics. Pair the film with high-quality DTF inks, and verify compatibility with your powder and curing process. When your film stock and ink set are aligned, you’ll see richer color, smoother gradients, and better adhesion in direct-to-film transfers.
Take a preflight approach to film and ink selection by evaluating transparency, adhesion, and wash durability. Test on a range of textiles—cotton, blends, and synthetics—to confirm that your prints maintain vibrancy after washing. Document the results as part of your DTF printing plan, so you can troubleshoot more quickly if a batch doesn’t match the baseline.
DTF Tips for Adhesion: Fabric Prep, Pre-Press, and Powder Handling
Fabric preparation matters as much as the print. Pre-wash garments to remove finishes, then dry thoroughly and pre-press to reduce moisture and wrinkles. A clean, even surface minimizes edge lifting and ghosting, helping the adhesive powder to distribute evenly. Treat this step as essential DTF tips for consistent results across different fabrics.
Set up a dust-free workspace and handle the printed film with clean hands to prevent lint and stray fibers from embedding into the transfer. Apply adhesive powder in a uniform layer and ensure you cure it according to the manufacturer’s directions. Proper handling of powder and a controlled environment are small but impactful factors in achieving crisp edges and uniform hand feel.
Heat Press for DTF: Temperature, Time, and Pressure Tweaks
An effective heat press for DTF requires attention to temperature, time, and pressure. Start with common starting points around 160–170°C (320–338°F) for 10–15 seconds and adjust based on fabric type and ink brand. Use a stable, even pressure and a solid, flat platen to ensure even transfer across the garment. Creating a few test strips helps you dial in the best settings for your setup, which is a key part of DTF troubleshooting and optimization.
After pressing, pay attention to post-press care and peel method. Some films require a hot peel; others a cold or room-temperature peel. Follow the manufacturer’s guidance for your specific system, and let the garment rest briefly before handling. Proper press parameters reduce edge curling and improve hand feel, which are critical for getting reliable results with DTF transfers.
Troubleshooting DTF Transfers: Common Issues and Fixes
Troubleshooting DTF transfers begins with a quick diagnosis of the symptom. Fading colors, ghosting, or edge cracking can result from inconsistent powder curing, poor ink density, or misaligned heat settings. Build a simple checklist that checks print resolution, color profiles, powder coverage, and film compatibility before reprinting. With a systematic approach, you’ll reduce downtime and improve repeatability in your DTF troubleshooting.
Maintain a log of successful settings for different fabrics and films, creating a library you can reference instead of guessing. Compare a known-good sample to current output and note any deviations in color, texture, or adhesion. Over time, this practice yields a more stable process and fewer wasteful experiments.
Direct-to-Film Transfers Workflow: From Design to Care
Direct-to-film transfers workflows span design, print, powder application, curing, pressing, and post-care. Start with trusted artwork and color management, then proceed through a tested print setup to guarantee consistent results across batches. Emphasize DTF printing practices that keep color fidelity intact while ensuring the film adheres well to fabrics of varying textures.
After the transfer, choose the appropriate peel method and educate end-users on post-care. Provide clear washing and drying guidelines to extend life and maintain vibrancy. By documenting the full workflow—from design to final care—you’ll optimize throughput and deliver repeatable results that align with customer expectations and your quality standards.
Frequently Asked Questions
What are DTF transfers and how do they work?
DTF transfers, or direct-to-film transfers, print designs onto a PET film with a white ink base, then apply adhesive powder and cure the film. The finished film is heat pressed onto fabric, enabling vibrant color and soft hand on a wide range of materials. This method often offers greater flexibility and durability than some traditional transfer methods.
What are essential DTF tips for achieving vibrant colors on different fabrics?
Key DTF tips include starting with high-quality designs and proper color management, selecting compatible DTF films and inks, and thorough fabric prep. Work in a device-independent color space (like sRGB) and proof colors with test prints to minimize shifts. These DTF tips help maintain color accuracy across fabrics and ensure consistent results.
How do I choose the right film and inks for DTF printing?
Choose a reliable PET film with good transparency and powder adhesion, and pair it with high-quality DTF inks that include a strong white ink layer for dark fabrics. Ensure your film, ink, and adhesive powder are all compatible to maximize vibrancy and durability of direct-to-film transfers. The right combination directly affects adhesion, color depth, and wash performance.
What are common DTF troubleshooting steps for issues like fading or edges lifting?
For DTF troubleshooting, check print resolution and color profiles, verify powder curing, and confirm heat settings and peel method per manufacturer guidance. Inspect the film and ink compatibility and ensure proper drying and handling of the film. Keeping a log of successful parameter combinations helps quickly reproduce reliable results across fabrics.
What heat press settings are recommended for DTF transfers?
A common starting point is about 160–170°C (320–338°F) for 10–15 seconds with firm pressure, but settings vary by brand and fabric. Adjust based on fabric type (cotton vs. polyester blends) and follow the specific film/ink guidelines. Fine-tuning these parameters is a core part of optimizing DTF transfers.
What is the typical workflow from design to finished DTF transfers?
A standard workflow starts with design and color management, then DTF printing on film, followed by powder application and curing. After film handling and pre-pressing the garment, perform the final press with appropriate temperature, time, and pressure, then complete with the recommended peel method and post-press care. This uninterrupted flow—DTF printing to direct-to-film transfers—helps ensure consistent, high-quality results.
| Key Point | Overview | ||||||||
|---|---|---|---|---|---|---|---|---|---|
| Focus keyword | Primary term used for the content. | ||||||||
| Related keywords | Terms related to DTF that support topics and SEO. | ||||||||
| Post title | DTF transfers: 10 Tips for Perfect Transfers Every Time | ||||||||
| Meta description | Summary for search results including keywords and topics. | ||||||||
| Introduction | Sets context, highlights benefits and scope of DTF transfers. | ||||||||
| Main content (10 tips) | Practical steps: design quality, film/ink, prep, print, powder, drying, pre-press, press settings, peel, troubleshooting. | ||||||||
| Tip 1: Start with high-quality designs and color management | Tip 2: Choose the right DTF film and inks | Tip 3: Prepare the fabric and workspace | Tip 4: Fine-tune your print settings for resolution and color | Tip 5: Apply adhesive powder evenly and cure properly | Tip 6: Drying, curing, and film handling practices | Tip 7: Pre-press the garment to remove moisture and wrinkles | Tip 8: Press settings — temperature, time, and pressure | Tip 9: Peel method and post-press care | Tip 10: Troubleshooting common issues and refining your process |
| Conclusion | Summarizes outcomes and encourages ongoing optimization. |
Summary
HTML table with key points about DTF transfers followed by a descriptive SEO-focused conclusion.